Data Migration among Sanboxes | Salesforce SOAP API
Data Migration among Sandboxes | Salesforce SOAP API
Setting up VS Code for the SOAP API and Moving Data From One Sandbox to another Sandbox.
Prerequisites.
Java Extension for Java VS Code.
Basic Knowledge of Java and Salesforce.
This can be done with both enterprise and partner WSDL. In this blog, we are going to use the partner WSDL.
Follow the below steps to get the WSDL from your org.
Go to Setup.
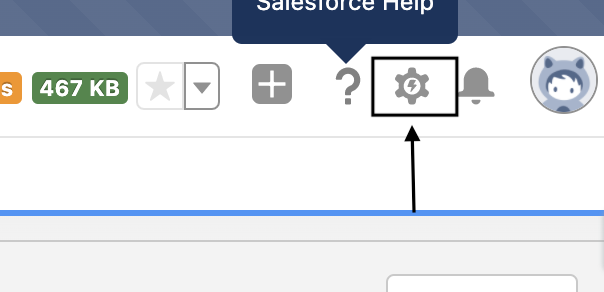
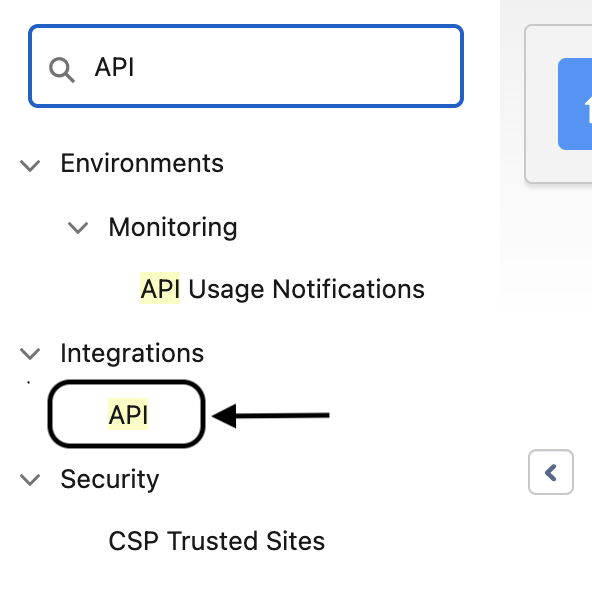
In the Quick Find Box, Write API and Select API under Integrations.
Now Click on Generate Enterprise WSDL link.
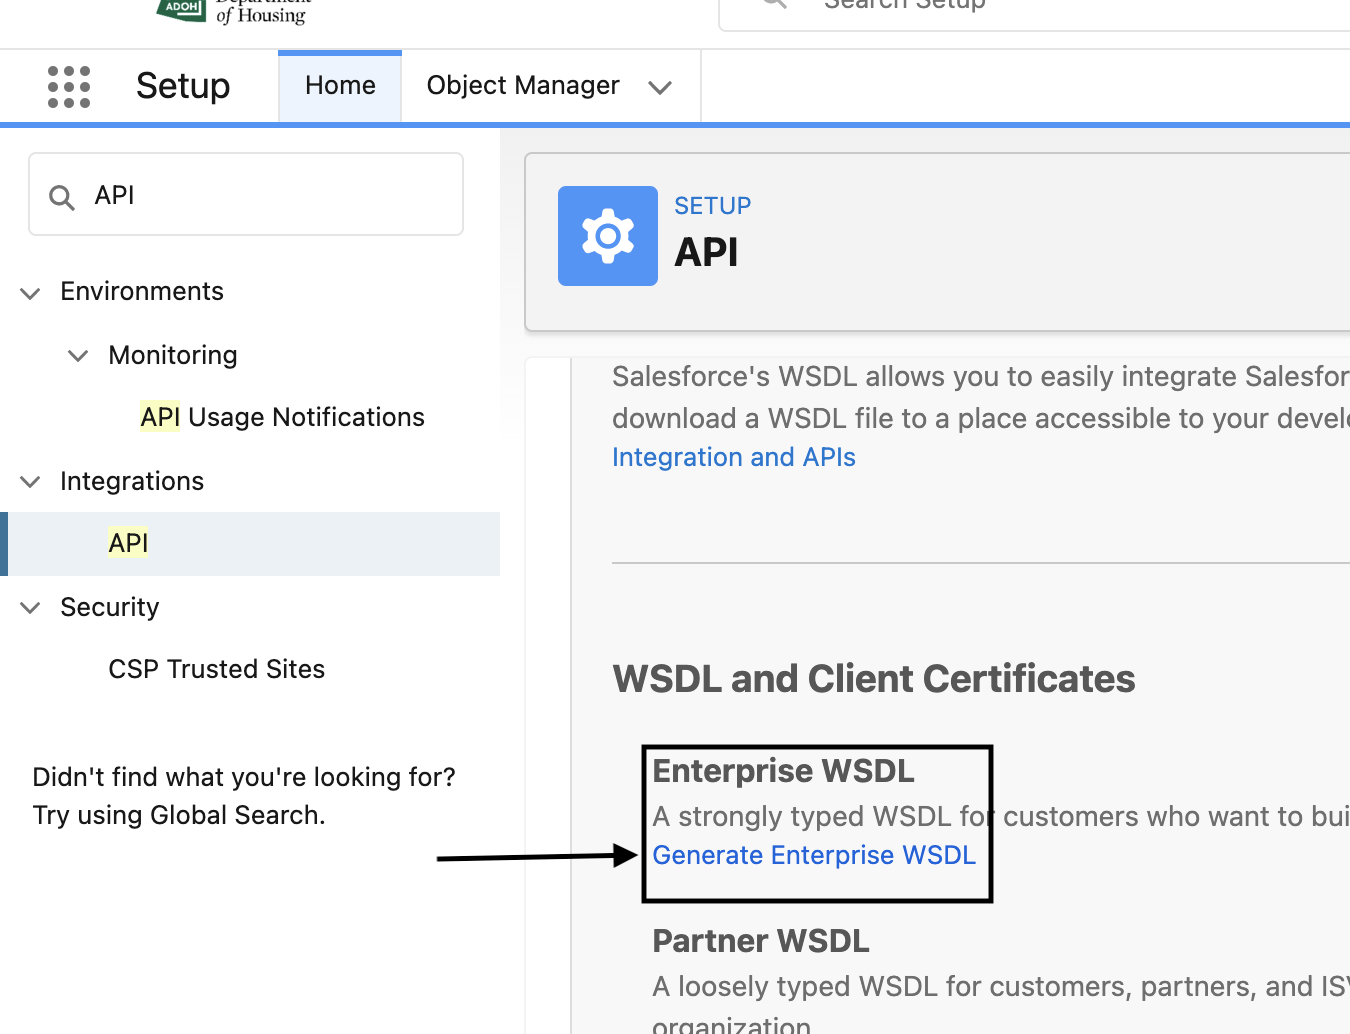
Now click on Generate icon to get the WSDL of your Org.

This will Generate the Org WSDL and show that on your browser screen. Copy that WSDL in any file (like ent.wsdl) and Save it. We will be using this WSDL to create STUB.
Generating Stub From WSDL.
Click on this link to download uber.jar https://repo1.maven.org/maven2/com/force/api/force-wsc/53.1.0/force-wsc-53.1.0-uber.jar.
Or you can navigate through the website https://mvnrepository.com/artifact/com.force.api/force-wsc and download the jar from here.
Open the terminal and use the below command to create a stub.
Command Format :
java -classpath force-wsc-xx.x.x-uber.jar com.sforce.ws.tools.wsdlc wsdlname.wsdl stubname.jar
I have the wsdl and wsdl.jar both in the same directory and terminal is opened in the same.
So the command in my case is. (It can be a bit different in you case).
java -classpath force-wsc-53.1.0-uber.jar com.sforce.ws.tools.wsdlc ent.wsdl wsdlFiles.jar
This will create a stub for you. This stub will be later used to communicate between orgs.
Creating a Java Project and Moving data between Sandboxes
Open Command Palette in VS Code.
For Windows : Press Ctrl + Shift + P.
For Mac : Press Command + Shift + P.

For this hands-on tutorial, we don’t need any Build Tool. So you can Select No Build Tools

Select Project location and give this a name.
Select Explorer in the VS Code and click on the + icon in the referenced libraries.
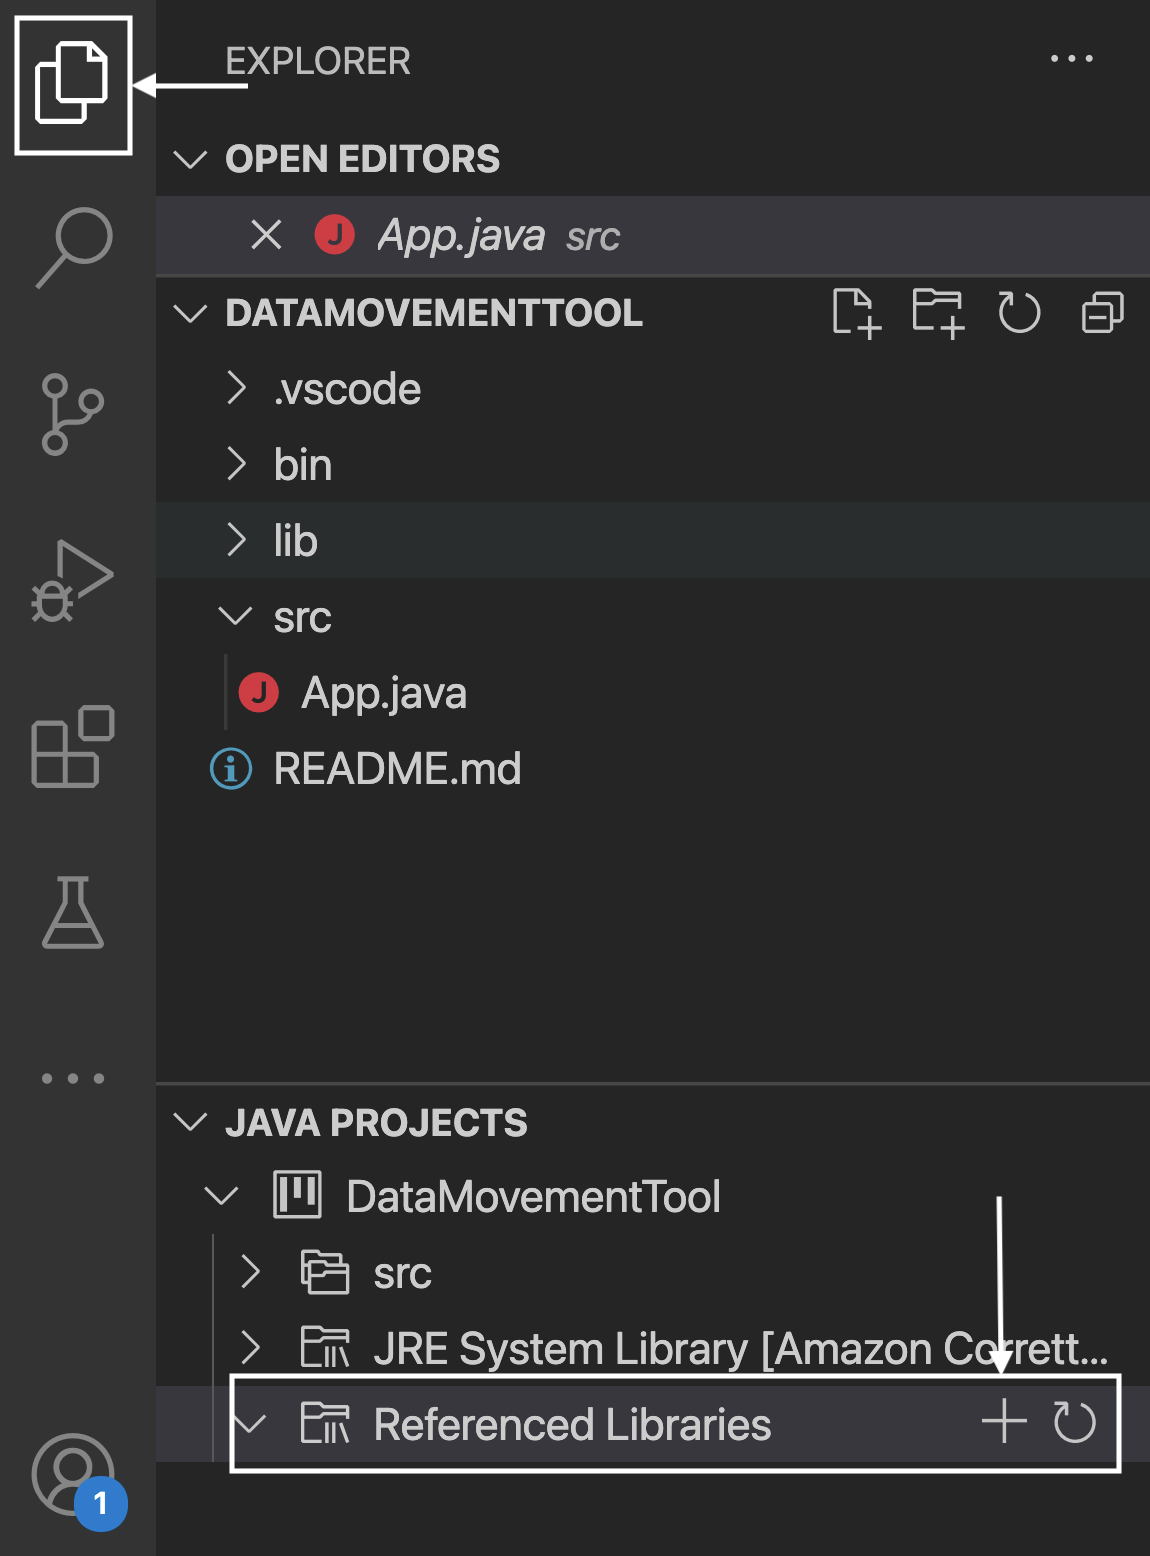
On clicking the + icon, File Explorer will open. Select the jar that we created using WSDL and uber.jar.
Use the below Sample Code to move the data
.
import com.sforce.soap.enterprise.sobject.Account;
import com.sforce.soap.enterprise.Connector;
import com.sforce.soap.enterprise.EnterpriseConnection;
import com.sforce.soap.enterprise.Error;
import com.sforce.soap.enterprise.QueryResult;
import com.sforce.soap.enterprise.SaveResult;
import com.sforce.soap.enterprise.sobject.SObject;
import com.sforce.ws.ConnectionException;
import com.sforce.ws.ConnectorConfig;
public class App {
//Credentials for the Source Org.
public static final String unameSource = "Source Org Username";
public static final String passSource = "Source Org Password";
//Credentials for the Target Org.
public static final String unameTarget = "Target Org Username";
public static final String passTarget = "Target Org Password";
//Enterprise Connection Objects.
public static EnterpriseConnection enterConnSource;
public static EnterpriseConnection enterConnTarget;
public static EnterpriseConnection doLoginEnterprise(String uname,String password ){
ConnectorConfig config = new ConnectorConfig();
config.setUsername(uname);
config.setPassword(password);
EnterpriseConnection enterConn = null;
try {
enterConn = Connector.newConnection(config);
System.out.println("Connected ....");
}catch(ConnectionException e) {
e.printStackTrace();
System.out.println("ERROR Occured,Not Connected....");
}
return enterConn;
}
public static void moveData(){
try {
//Querying the Data that we need to Move
String query = "SELECT Name,Type FROM Account Where Name='Avengers' ";
QueryResult qr = enterConnSource.query(query);
//Getting Queried Records.
SObject records[] = qr.getRecords();
SaveResult[] srArray = enterConnTarget.create(records);
for(SaveResult sr:srArray ){
if(sr.getSuccess()) {
System.out.println("Record Id is : "+sr.getId());
}else {
for(Error err: sr.getErrors()) {
System.out.println(err.getMessage());
}
}
}
}catch(ConnectionException e){
e.printStackTrace();
}
}
public static void main(String[] args) throws Exception {
//Connection to the Source Org.
enterConnSource = doLoginEnterprise(unameSource,passSource);
//Connection to the Target Org.
enterConnTarget = doLoginEnterprise(unameTarget,passTarget);
moveData();
}
}
Run the Program and the Records Filtered will be moved from Source Sandbox to target Sandbox.

Comments
Post a Comment